Configuration of Microsoft M365 Veeam Backup App Registration
Information on how to configure your M365 tenant for AUCyber's M365 Backup as a Service¤
This guide outlines the steps required to configure and implement your Microsoft 365 Backup with AUCyber using the modern app-only authentication method. Backup and restore both authenticate with a certificate against a Microsoft Entra ID application registered in your tenant, so no backup service account is required. You will be allocated a Customer Success Manager (CSM) who will assist you with the on-boarding process, provide advice and act as a conduit to deeper technical support when required.
Prerequisites¤
- Customers must have a Microsoft 365 account that has an active subscription.
-
The account used for configuration must have permission to manage applications in Microsoft Entra ID (formerly Azure Active Directory). Any of the following Entra ID roles include the required permissions:
-
Granting tenant-wide admin consent to the application permissions requires a Global Administrator.
- AUCyber will provide you with a certificate (public key) to be used during application registration. This certificate is used to authenticate both backup and restore operations.
- Configuration is performed in the Microsoft Entra admin center.
Microsoft Entra ID application permissions¤
Register an application¤
- In the Microsoft Entra admin center, go to Identity > Applications > App registrations.
- Select New registration.
-
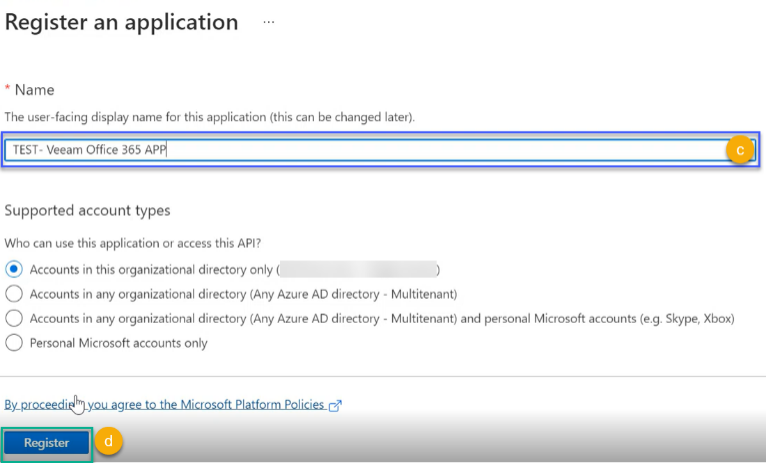
Enter a display Name and select Accounts in this organizational directory only.
Note
The Redirect URI can be left blank.
-
Select Register to complete the initial app registration.
Grant Global Reader permission¤
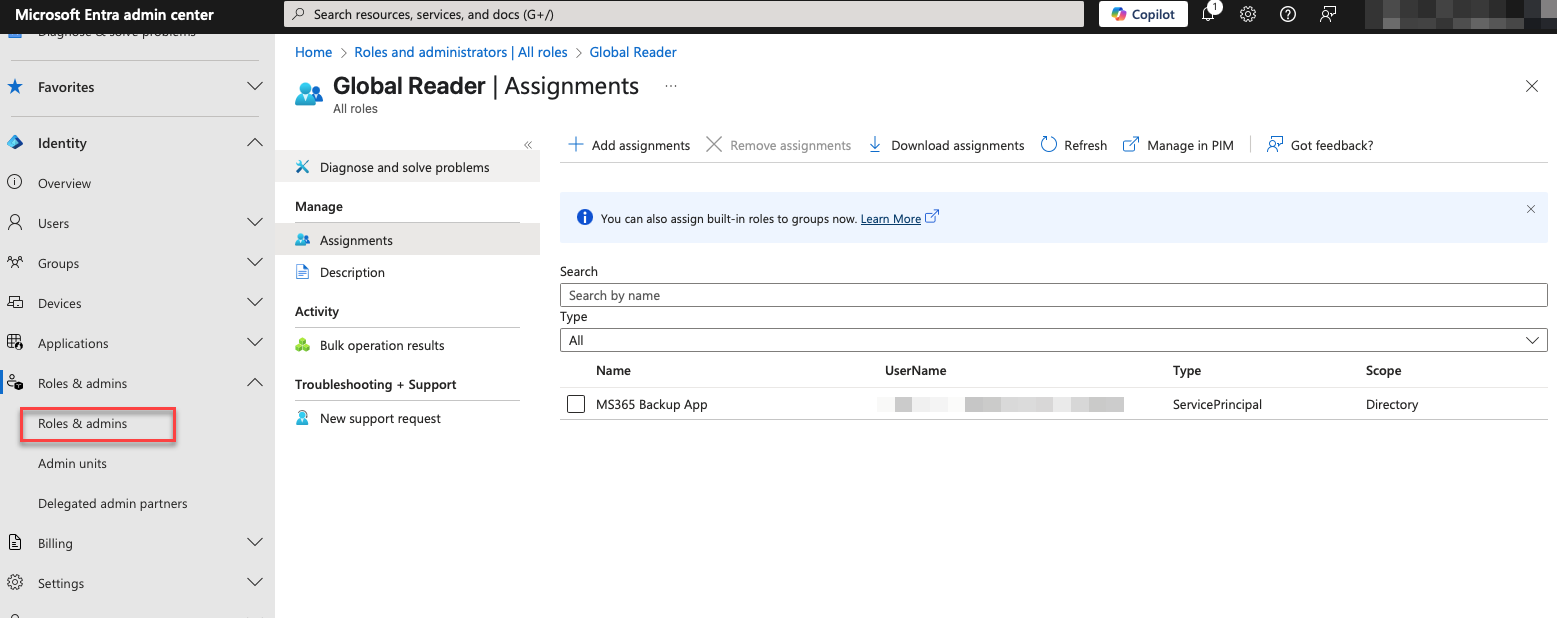
The Global Reader role must be assigned to the application itself. It is required by the Exchange.ManageAsApp permission to back up public folder and discovery search mailboxes. To grant the role, do the following:
-
In the Microsoft Entra admin center, go to Identity > Roles & admins > Roles & admins.
-
In the Administrative roles list, find the Global Reader role and click on it.
- In the Global Reader window, click Add assignments.
- In the Select member(s) section, click the link.
- In the Select a member window, select the application you registered and click Select.
- The selected application appears in the Selected member(s) list.
- Click Next and then Assign to finish the wizard.
Configure Application permissions¤
Select the newly registered application, select API permissions, and add permissions for:
- Microsoft Graph
- Office 365 Exchange Online
-
Office 365 SharePoint Online
Note
To search for other APIs, select APIs my organisation uses.
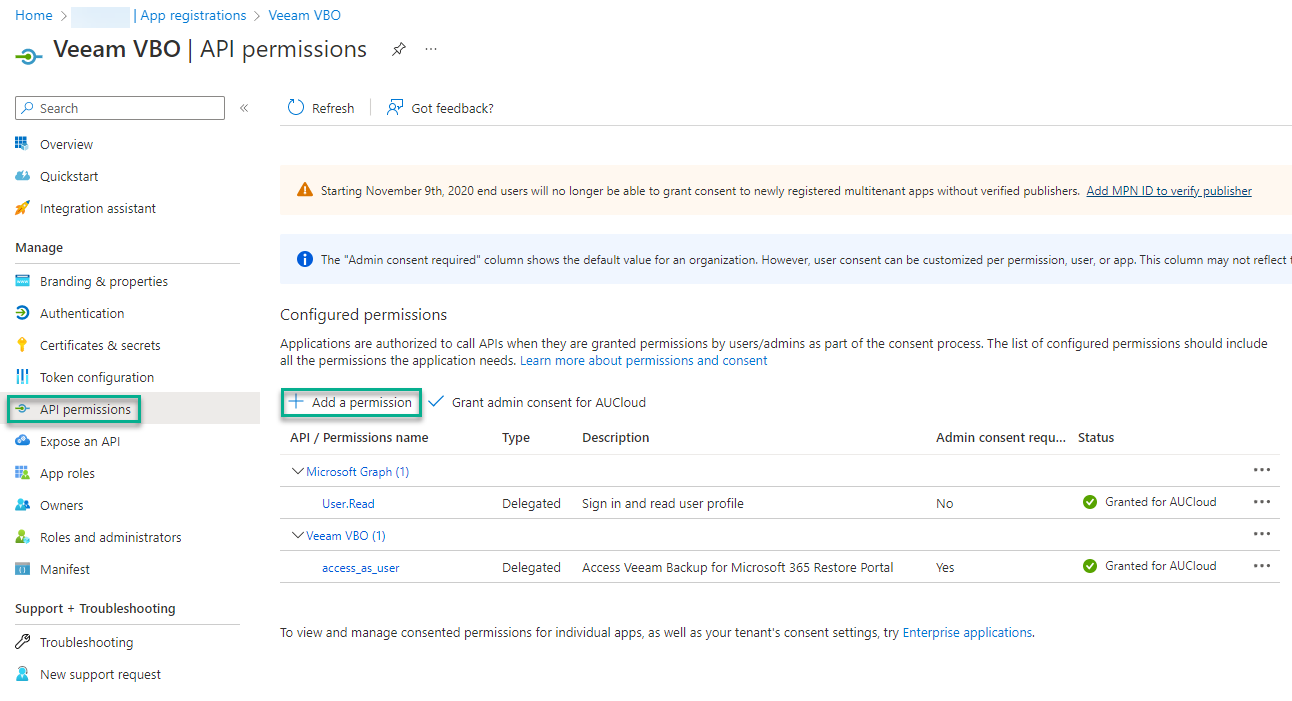
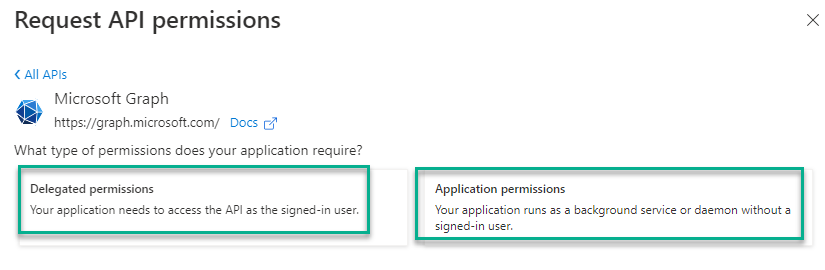
All required permissions are of the Application type. Delegated permissions are not required: restores are performed using the application certificate, not a signed-in user.
Add every permission listed in both tables on the Entra ID Application Permission Requirements page:
Exchange Web Services (EWS) retirement
Microsoft disables EWS in Exchange Online on 1 October 2026. The Microsoft Graph mailbox permissions in the tables (User.Read.All, MailboxItem.ImportExport.All, MailboxFolder.ReadWrite.All and MailboxItem.Read.All) allow Exchange data to be backed up and restored through the Microsoft Graph API instead of EWS. Make sure they are granted, otherwise Exchange backups will fail once Microsoft retires EWS.
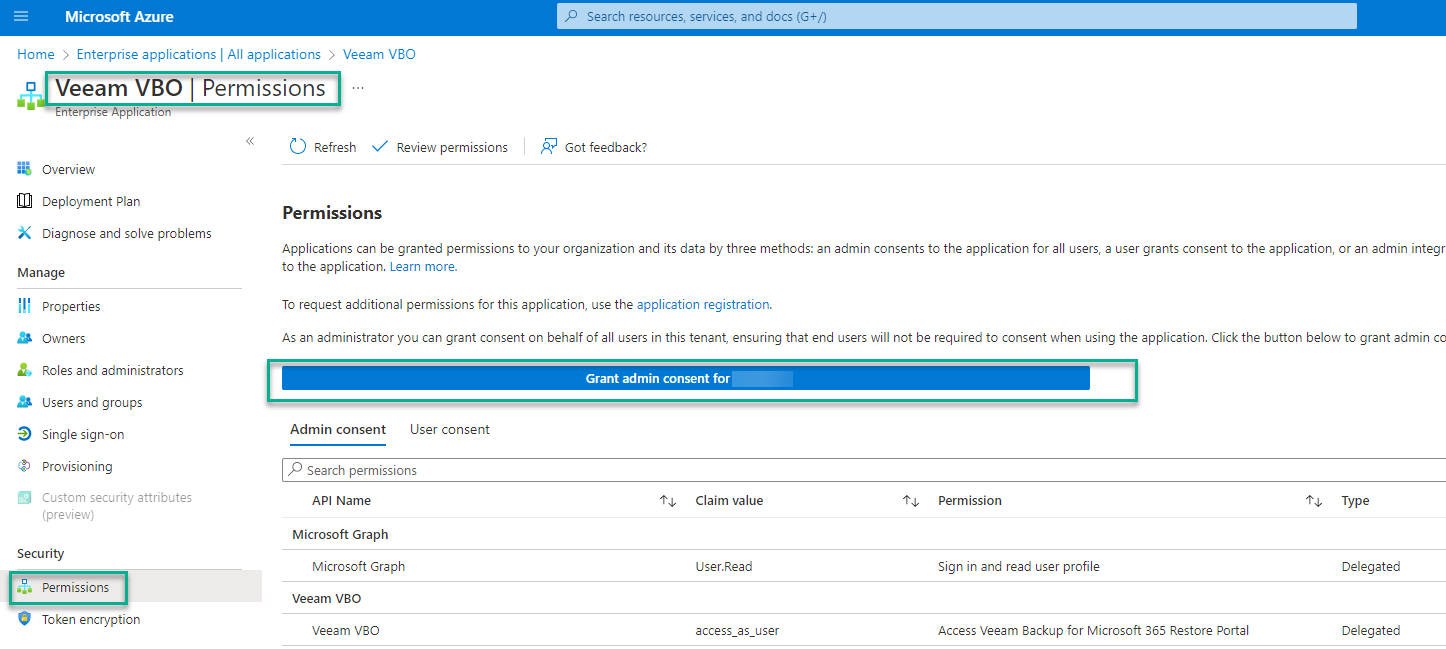
After all permissions are added, you will need to grant admin consent:
Add a Certificate (public key)¤
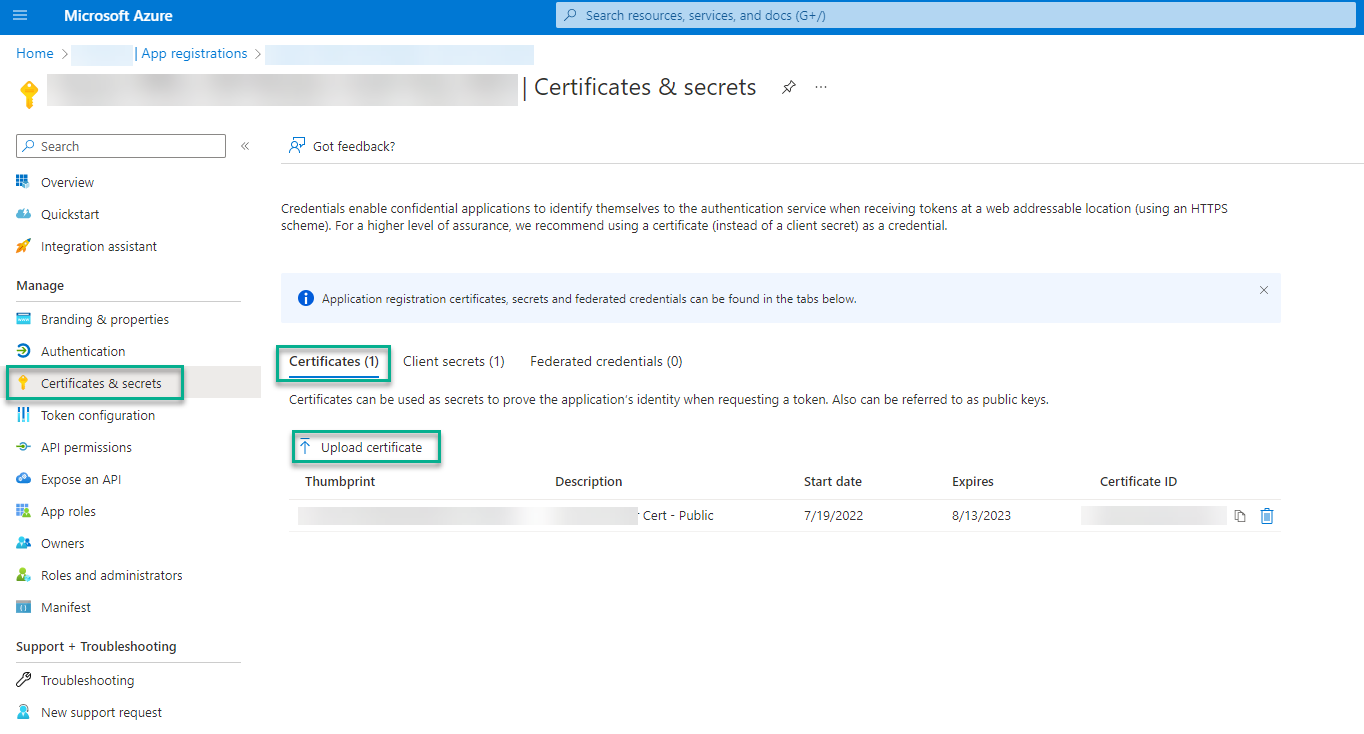
- Select Certificates & secrets > Certificates.
- Select Upload certificate.
-
Browse for the certificate to be uploaded.
Note
AUCyber will provide this certificate.
-
Enter a description.
- Select Add.
Join secure meeting with AUCyber¤
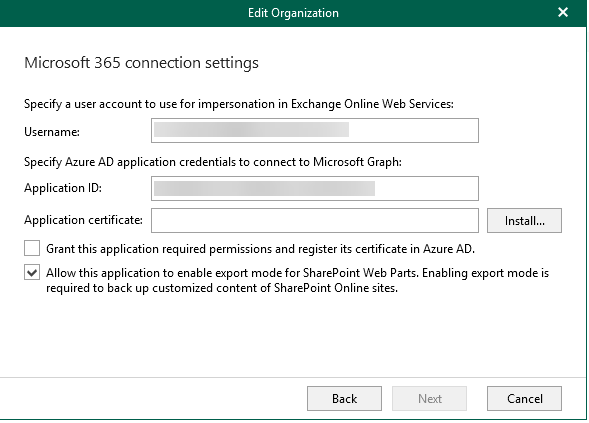
A joint session with the AUCyber technical team is required for you to provide the details needed to finalise the configuration of the Veeam Backup for Microsoft 365 application. This can be organised via Webex, Zoom, Teams chat or face-to-face meeting. Please advise your CSM on what suits best.
- Application (client) ID of the registered application
- Your Microsoft 365 organization name (for example contoso.onmicrosoft.com)
Restore Portal Access Requirements¤
To access the Veeam restore portal, you must add an Enterprise Application in Entra ID
Prerequisite¤
For the below, you need to use an account with enough rights to perform an Enterprise Application install on Entra ID. In order to perform these steps, we will need the Microsoft Graph PowerShell module. To install this, open PowerShell and run the following command:
Install-Module Microsoft.Graph -Scope CurrentUser -Force
Note
You may be prompted to install and import the NuGet provider. Please press Y to continue through this.
The next command will connect your PowerShell to Entra ID. Use credentials with admin rights to perform an Enterprise Application install:
Connect-MgGraph -Scopes "Application.ReadWrite.All"
This will open a traditional username and password Microsoft popup: Please enter your username and password in this popup including MFA if prompted.
We should see something like this if everything worked smoothly:

And the final step which brings everything together:
New-MgServicePrincipal -AppId "33831092-5ae1-4b51-9eb2-a90033803540"
If everything works as expected, the output should show something similar to this:

Note
If you receive an error that the application ID already exists, you must delete the pre-existing Enterprise Application 'Veeam VBO' from your Entra ID and then repeat the above command.
Last-Step - Give permission to the new Application on Entra ID
- In the Microsoft Entra admin center, go to Identity > Applications > Enterprise applications, remove the application type filter, and order by created date.
You should see a new Veeam VBO application (the name of the Restore Portal).
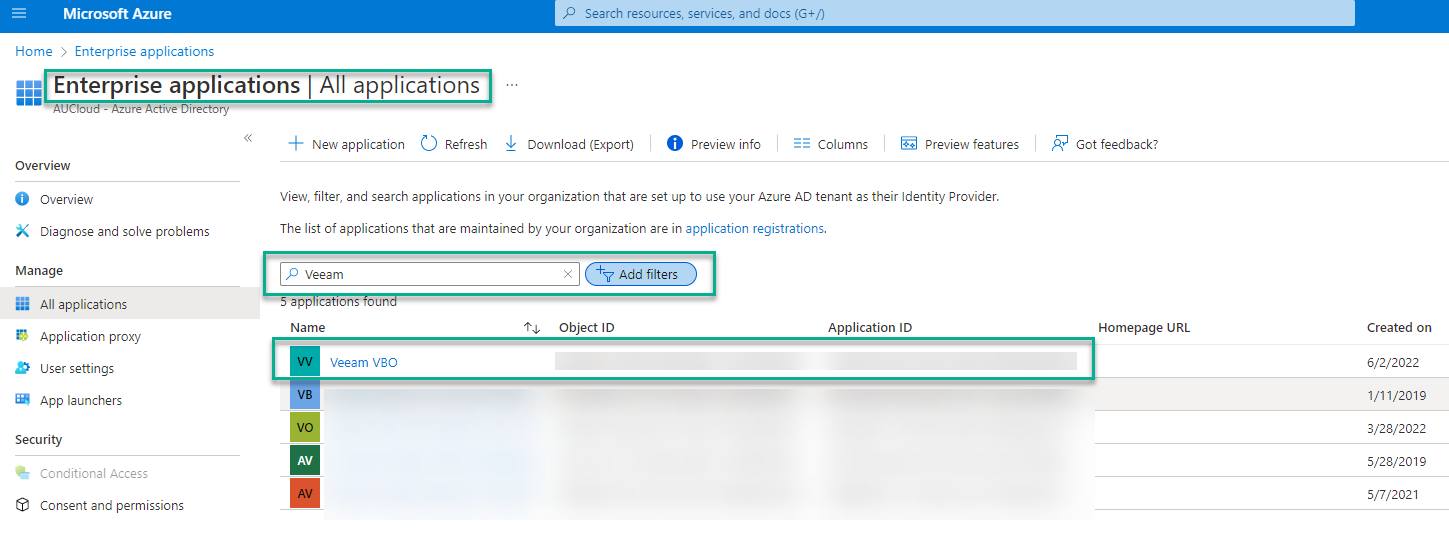
On the Enterprise Application, go to Permissions, and press Grant admin consent
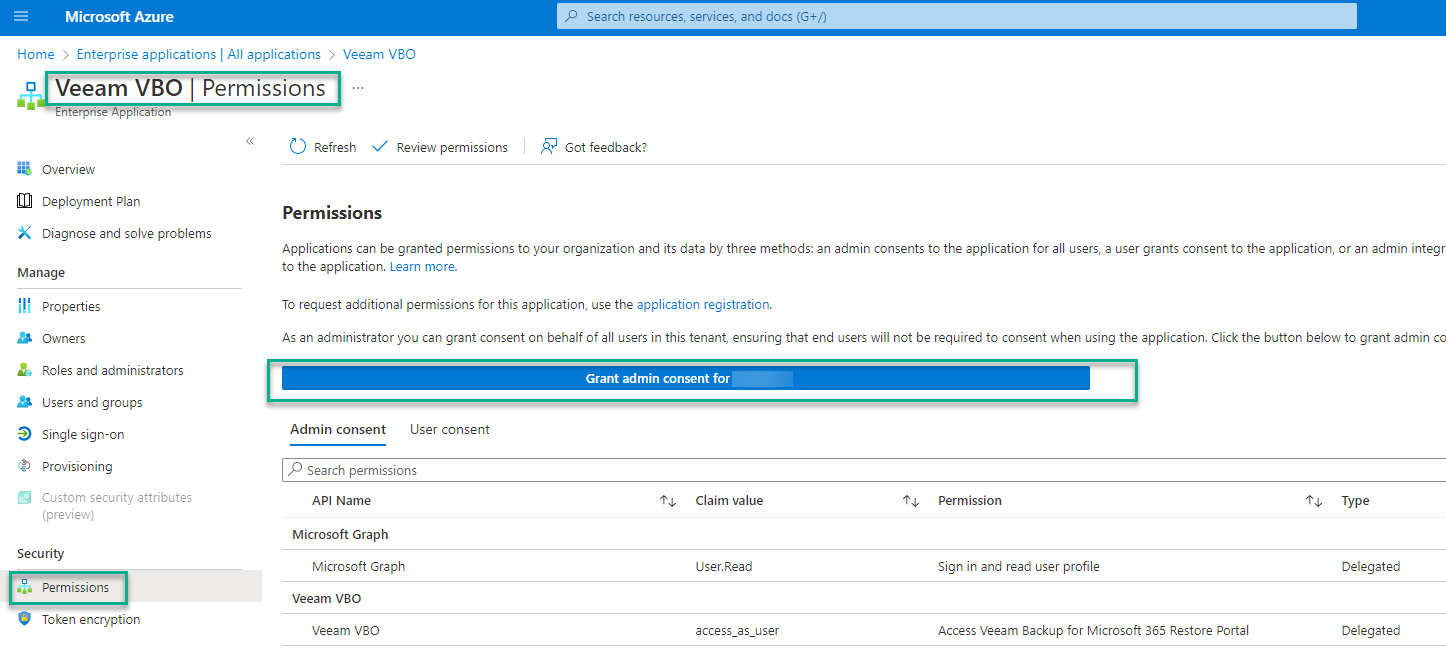
That process will ask us again for an authorized account.
We should see something like this:
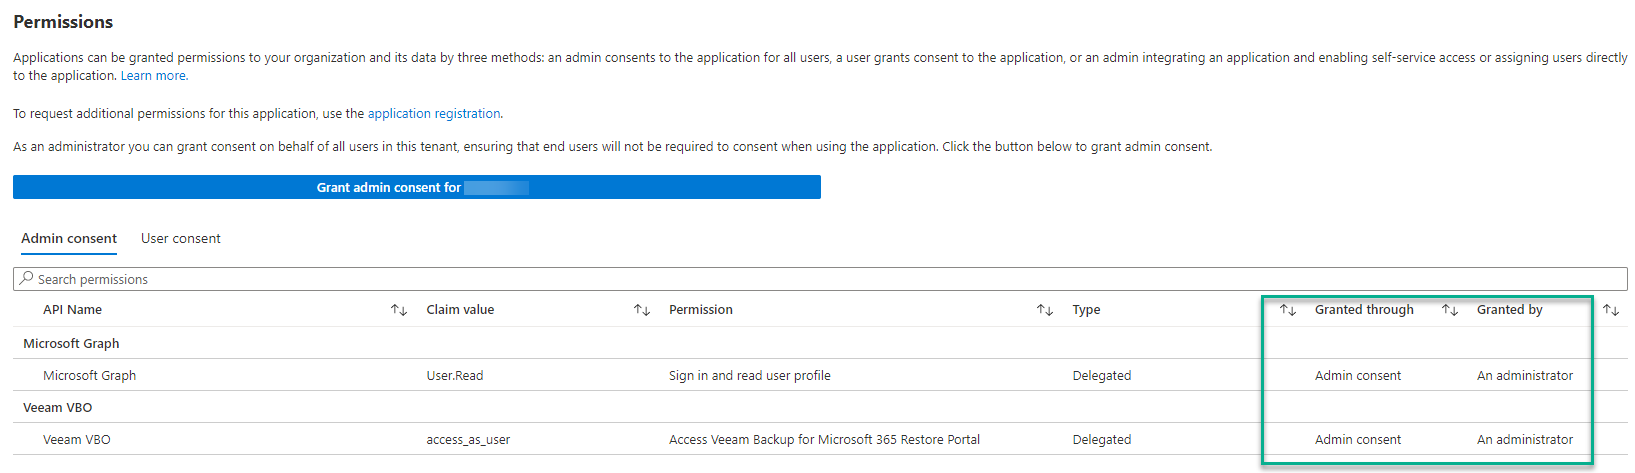
Configuration is completed. You can then proceed to test connectivity to the Restore Portal.